
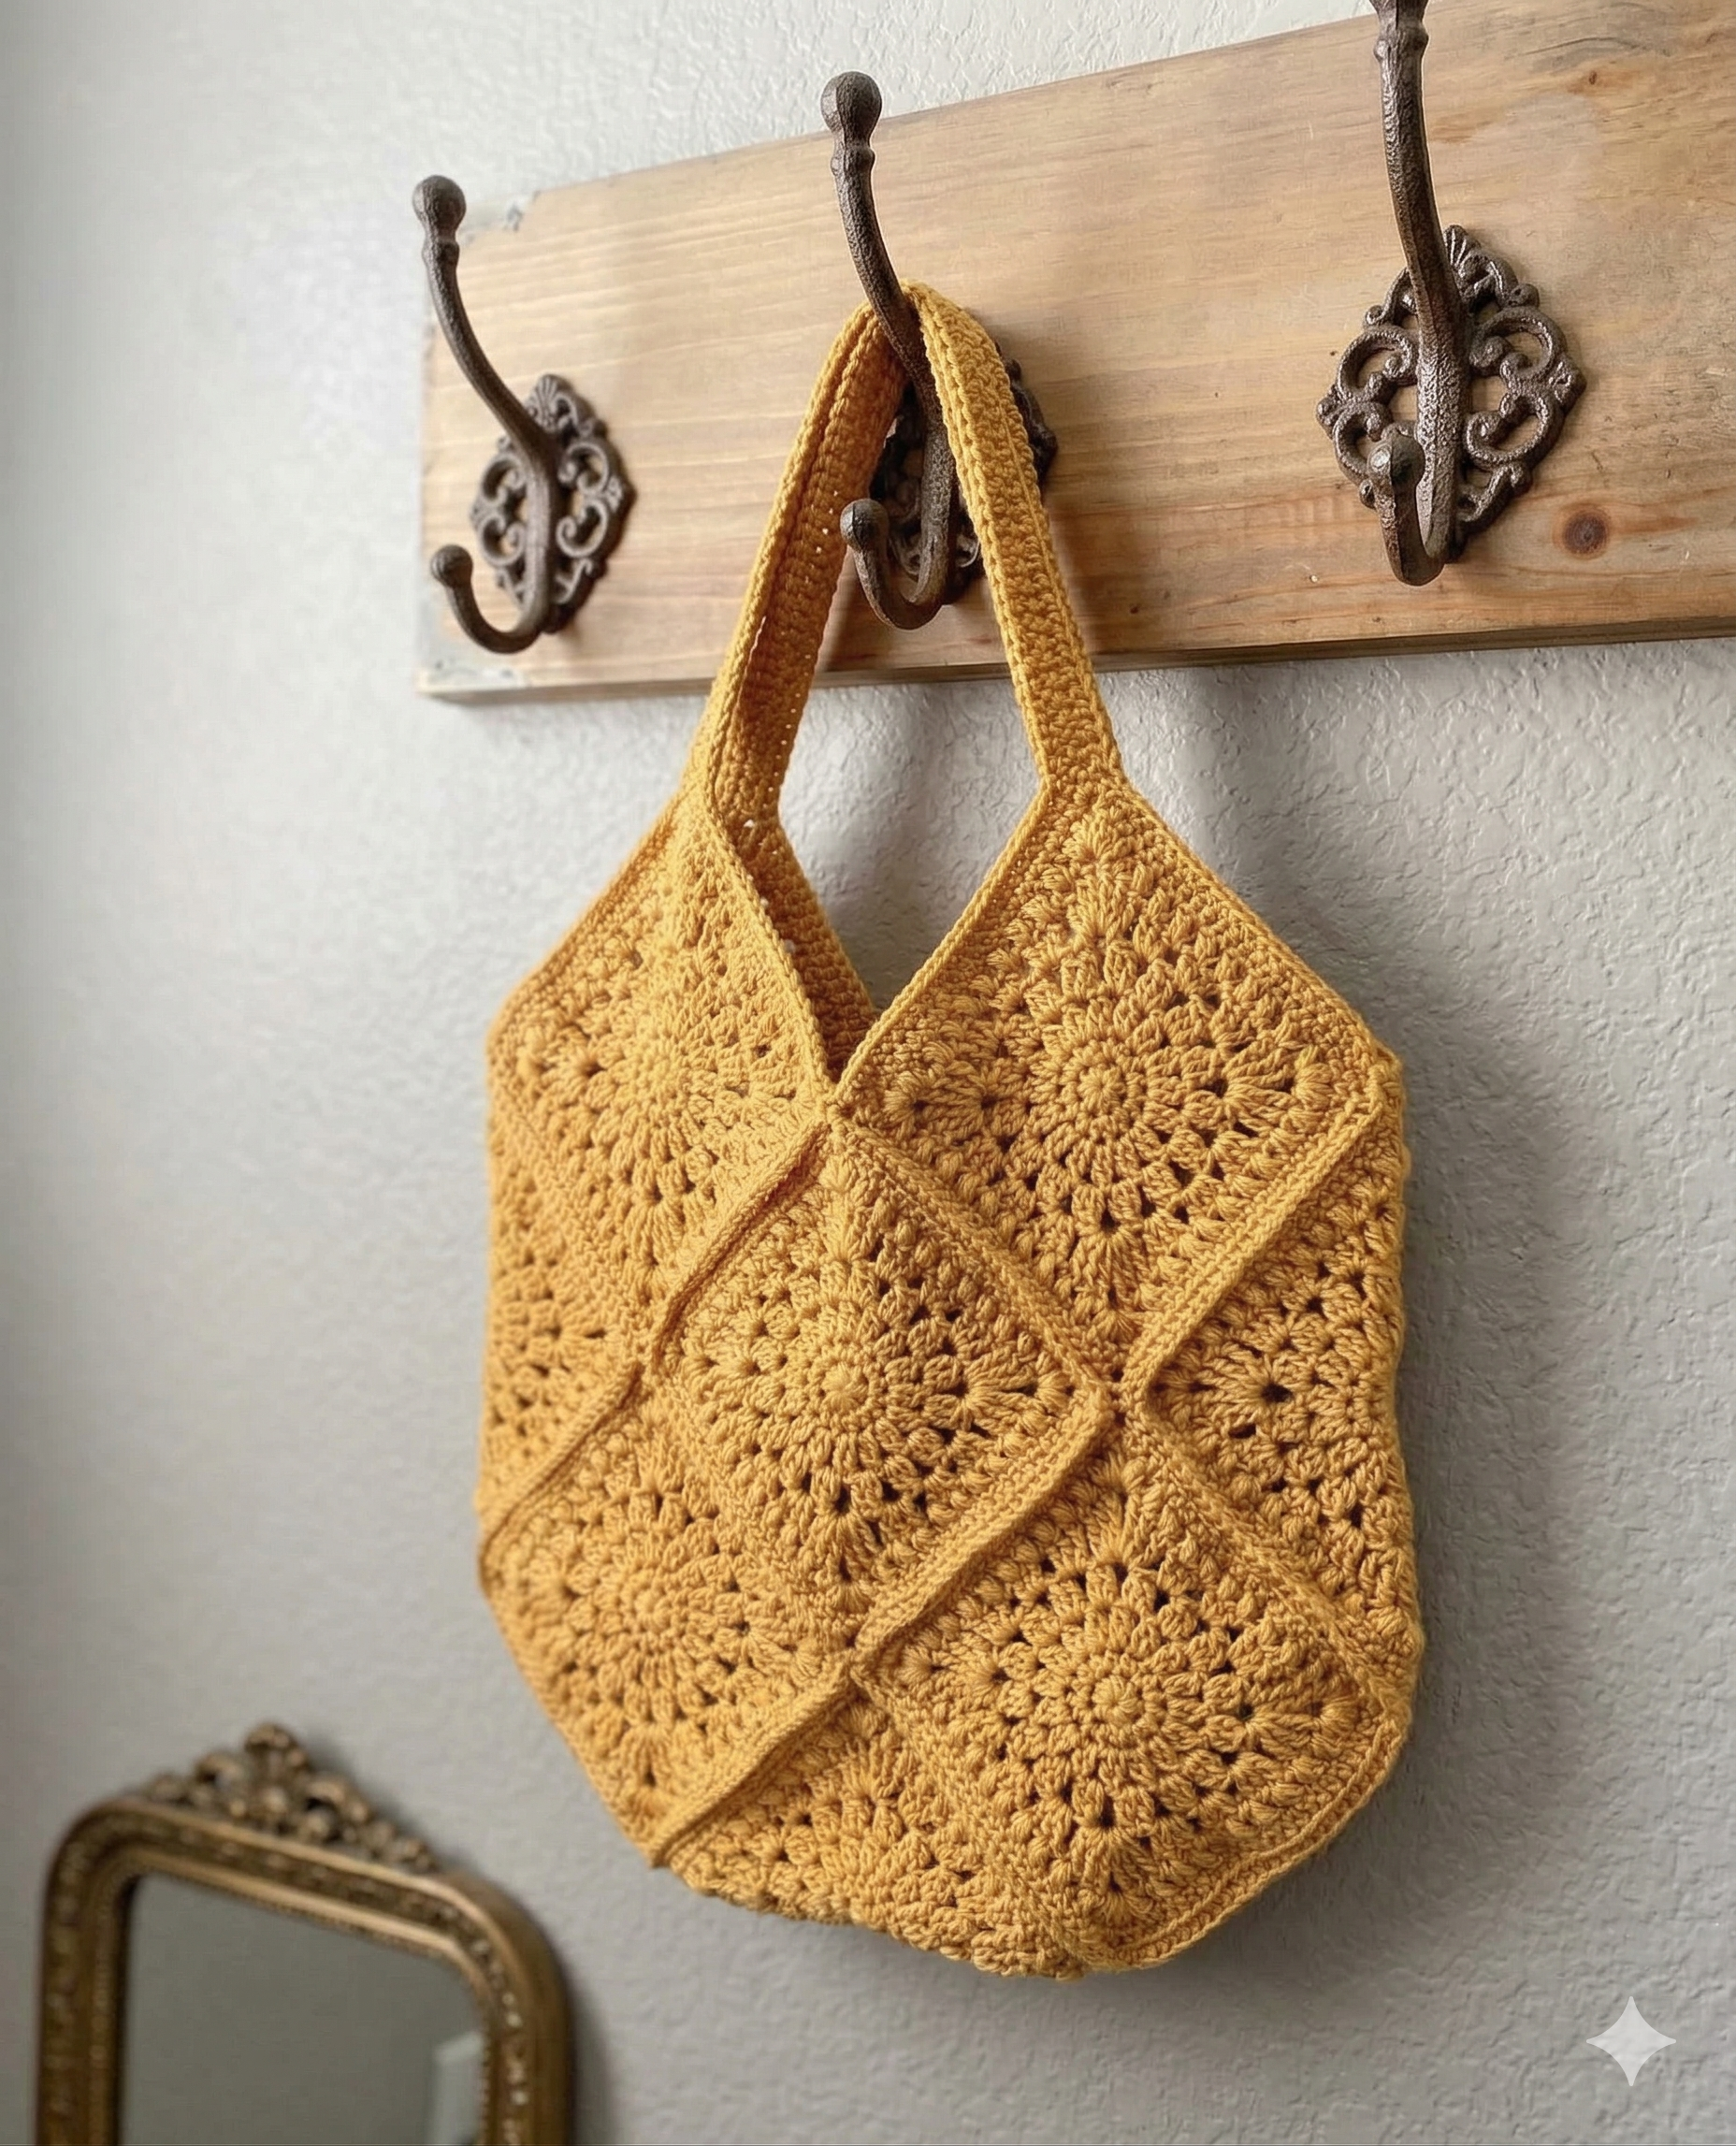
If you love crochet projects with that soft handmade charm, this granny square bag is such a lovely one to make. It has that beautiful mix of vintage-inspired texture and practical everyday style, which makes it perfect for using as a market bag, project bag, or simply as a pretty handmade accessory.
Sunburst Granny Square Bag Motif Pattern
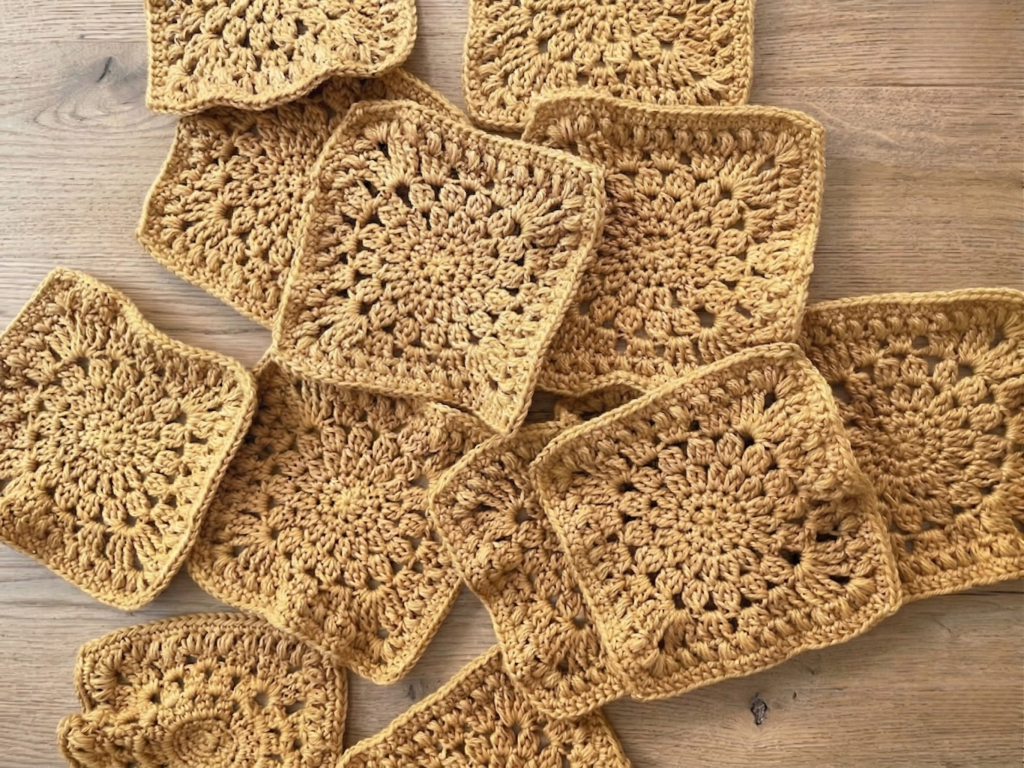
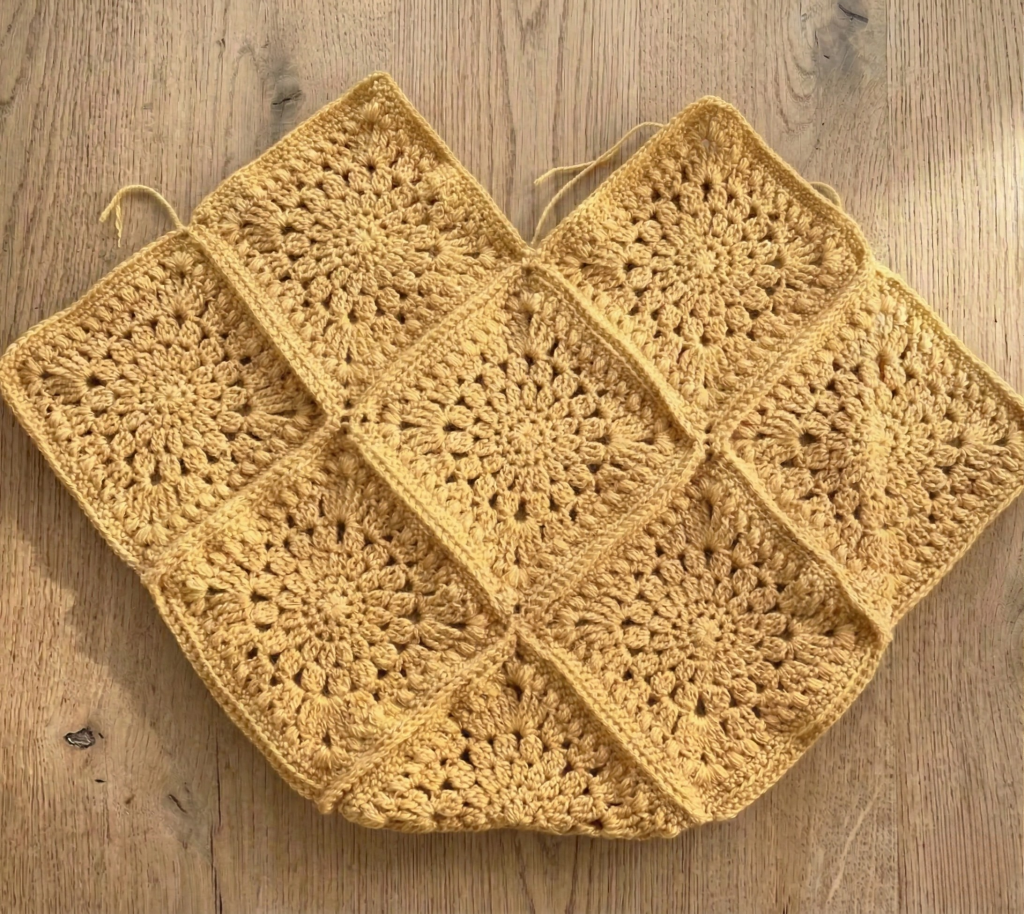
The Sunburst Granny Square Bag is made by crocheting and joining 13 textured granny squares together to create a relaxed, roomy bag with plenty of character. It is one of those projects that feels classic and cozy, while still being completely on trend. You can make it in a single colour for a timeless look, or mix shades together for something more playful and full of personality.
One of the nicest things about this project is that it looks detailed and impressive, but once you get into the rhythm of the square pattern, it becomes such an enjoyable make. It is the kind of crochet project you can settle into over a weekend, working through a square or two at a time and slowly watching your bag come together.
Is This an Easy Granny Square Bag Pattern?
This is a fairly easy pattern and would suit an advanced beginner nicely. If you already know the basics of crochet and feel comfortable following a pattern with a few different stitch techniques, this is a lovely project to build confidence with.
The square itself has a beautiful textured design, and while it may look intricate at first, it becomes much easier once you’ve made the first one.
How Long Does It Take to Make?
This bag is a wonderful weekend-style crochet project. Each square takes around 30 minutes to make, and then you’ll need a little extra time to join them together and crochet the handles.
Altogether, it is very realistic to make this bag over a weekend, especially if you enjoy slow, cozy makes that come together one step at a time.
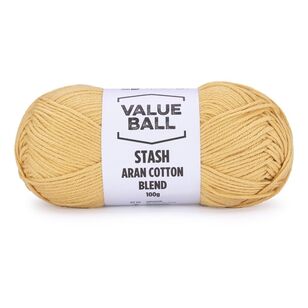
Yarn Choice for a Crochet Market Bag
For this bag, I used an Aran Cotton Blend, and it is a lovely option. It gives you some of the strength and structure of cotton, while also being a little more affordable than using 100% cotton.
This blend also helps the bag hold its shape better than a standard acrylic yarn, which can sometimes stretch too much for a market-style bag. If you want a bag that feels practical but still soft and comfortable to use, a cotton blend is such a nice choice.
What Stitches Do You Need to Know?
This project is great for adventurous beginners or intermediate crocheters who are happy working with a variety of stitches. To make the Sunburst Granny Square Bag, you’ll need to know how to do the following:
- magic ring
- half double crochet
- slip stitch
- chain stitch
- 2DC Cluster
- 3DC Cluster
- double crochet
- treble crochet
- bean stitch
- blocking granny squares
- foundation half double crochet
- single crochet in the back loop only for joining
If you already know most of these, you’ll likely find this pattern very manageable.
How Many Squares Do You Need?
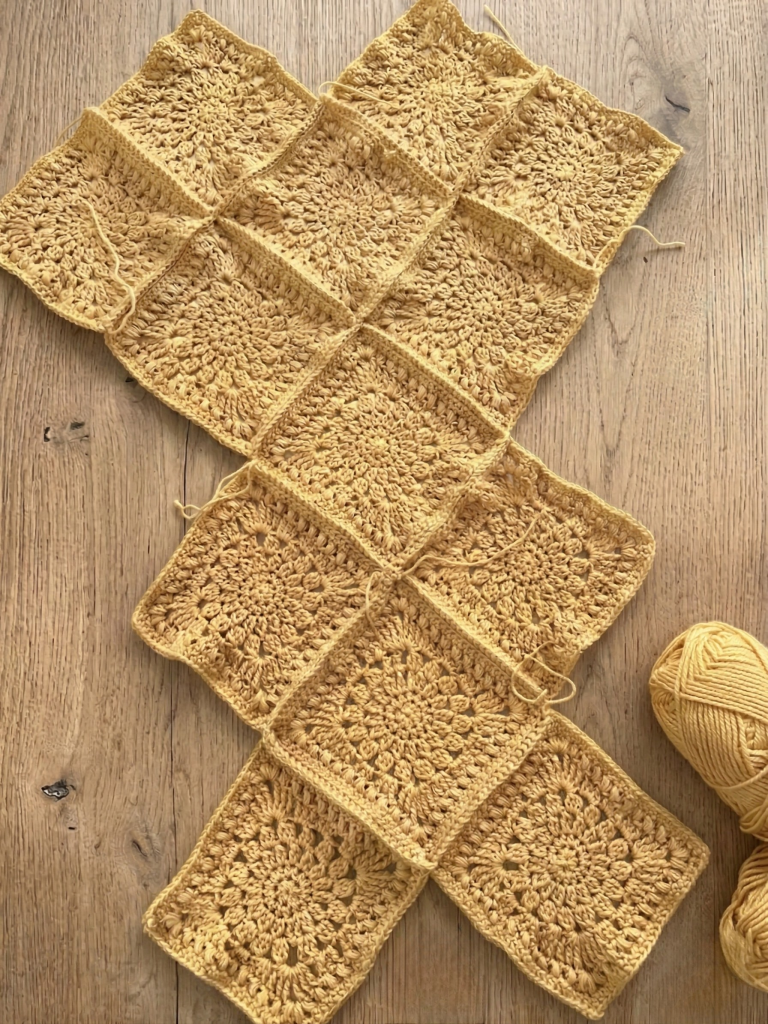
The Sunburt Granny Square Bag uses 13 granny squares.
Once the squares are finished and blocked, they are joined together to form the body of the bag, and then the handles are crocheted in place.
Finished Size
The finished bag measures approximately:
- 45 x 45 cm
- Handles: 30 cm
Each finished square measures approximately:
- 16.5 x 16.5 cm
- 6.5 x 6.5 inches
These measurements are taken after blocking.
What You’ll Need
- Aran cotton blend yarn – 4 skeins in the colour Wheat or the colour of your choice.
- 4.0 mm crochet hook
- 4.5 mm crochet hook
- scissors
- yarn needle
Important Pattern Information
- This pattern is written in US crochet terms
- The beginning chain counts as a stitch throughout
- The square is worked in joined rounds
- Join each round with a slip stitch unless otherwise stated
Abbreviations
- 2DCcl = 2DC Cluster
- 3DCcl = 3DC Cluster
- ch = chain
- FHDC = Foundation Half Double Crochet
- HDC = Half double crochet
- DC = Double crochet
- TR = Treble crochet
- sp = space
- st = stitch
- ss = slip stitch
- YO = yarn over
- BSt = Bean Stitch
Special Stitches
2DC Cluster (2DCcl)
Yarn over, insert hook into stitch, pull up a loop, yarn over and pull through 2 loops.
Yarn over, insert hook into the same stitch, pull up a loop, yarn over and pull through 2 loops.
Yarn over and pull through all loops on the hook.
3DC Cluster (3DCcl)
Yarn over, insert hook into stitch, pull up a loop, yarn over and pull through 2 loops.
Repeat this process 2 more times in the same stitch.
Yarn over and pull through all loops on the hook.
Bean Stitch (BSt)
Insert hook into stitch and pull up a loop, yarn over.
Insert hook into the same stitch and pull up a loop, yarn over.
Insert hook into the same stitch and pull up a loop, yarn over.
You will now have 6 loops on the hook.
Yarn over and pull through all loops, then chain 1.
Foundation Half Double Crochet (FHDC)
Chain 2.
Yarn over, insert hook into the 3rd chain from hook, then: yarn over, pull up a loop, yarn over, draw through 1 loop to create the chain base, yarn over, draw through all 3 loops.
For the next stitch, insert hook into the chain just made and repeat.
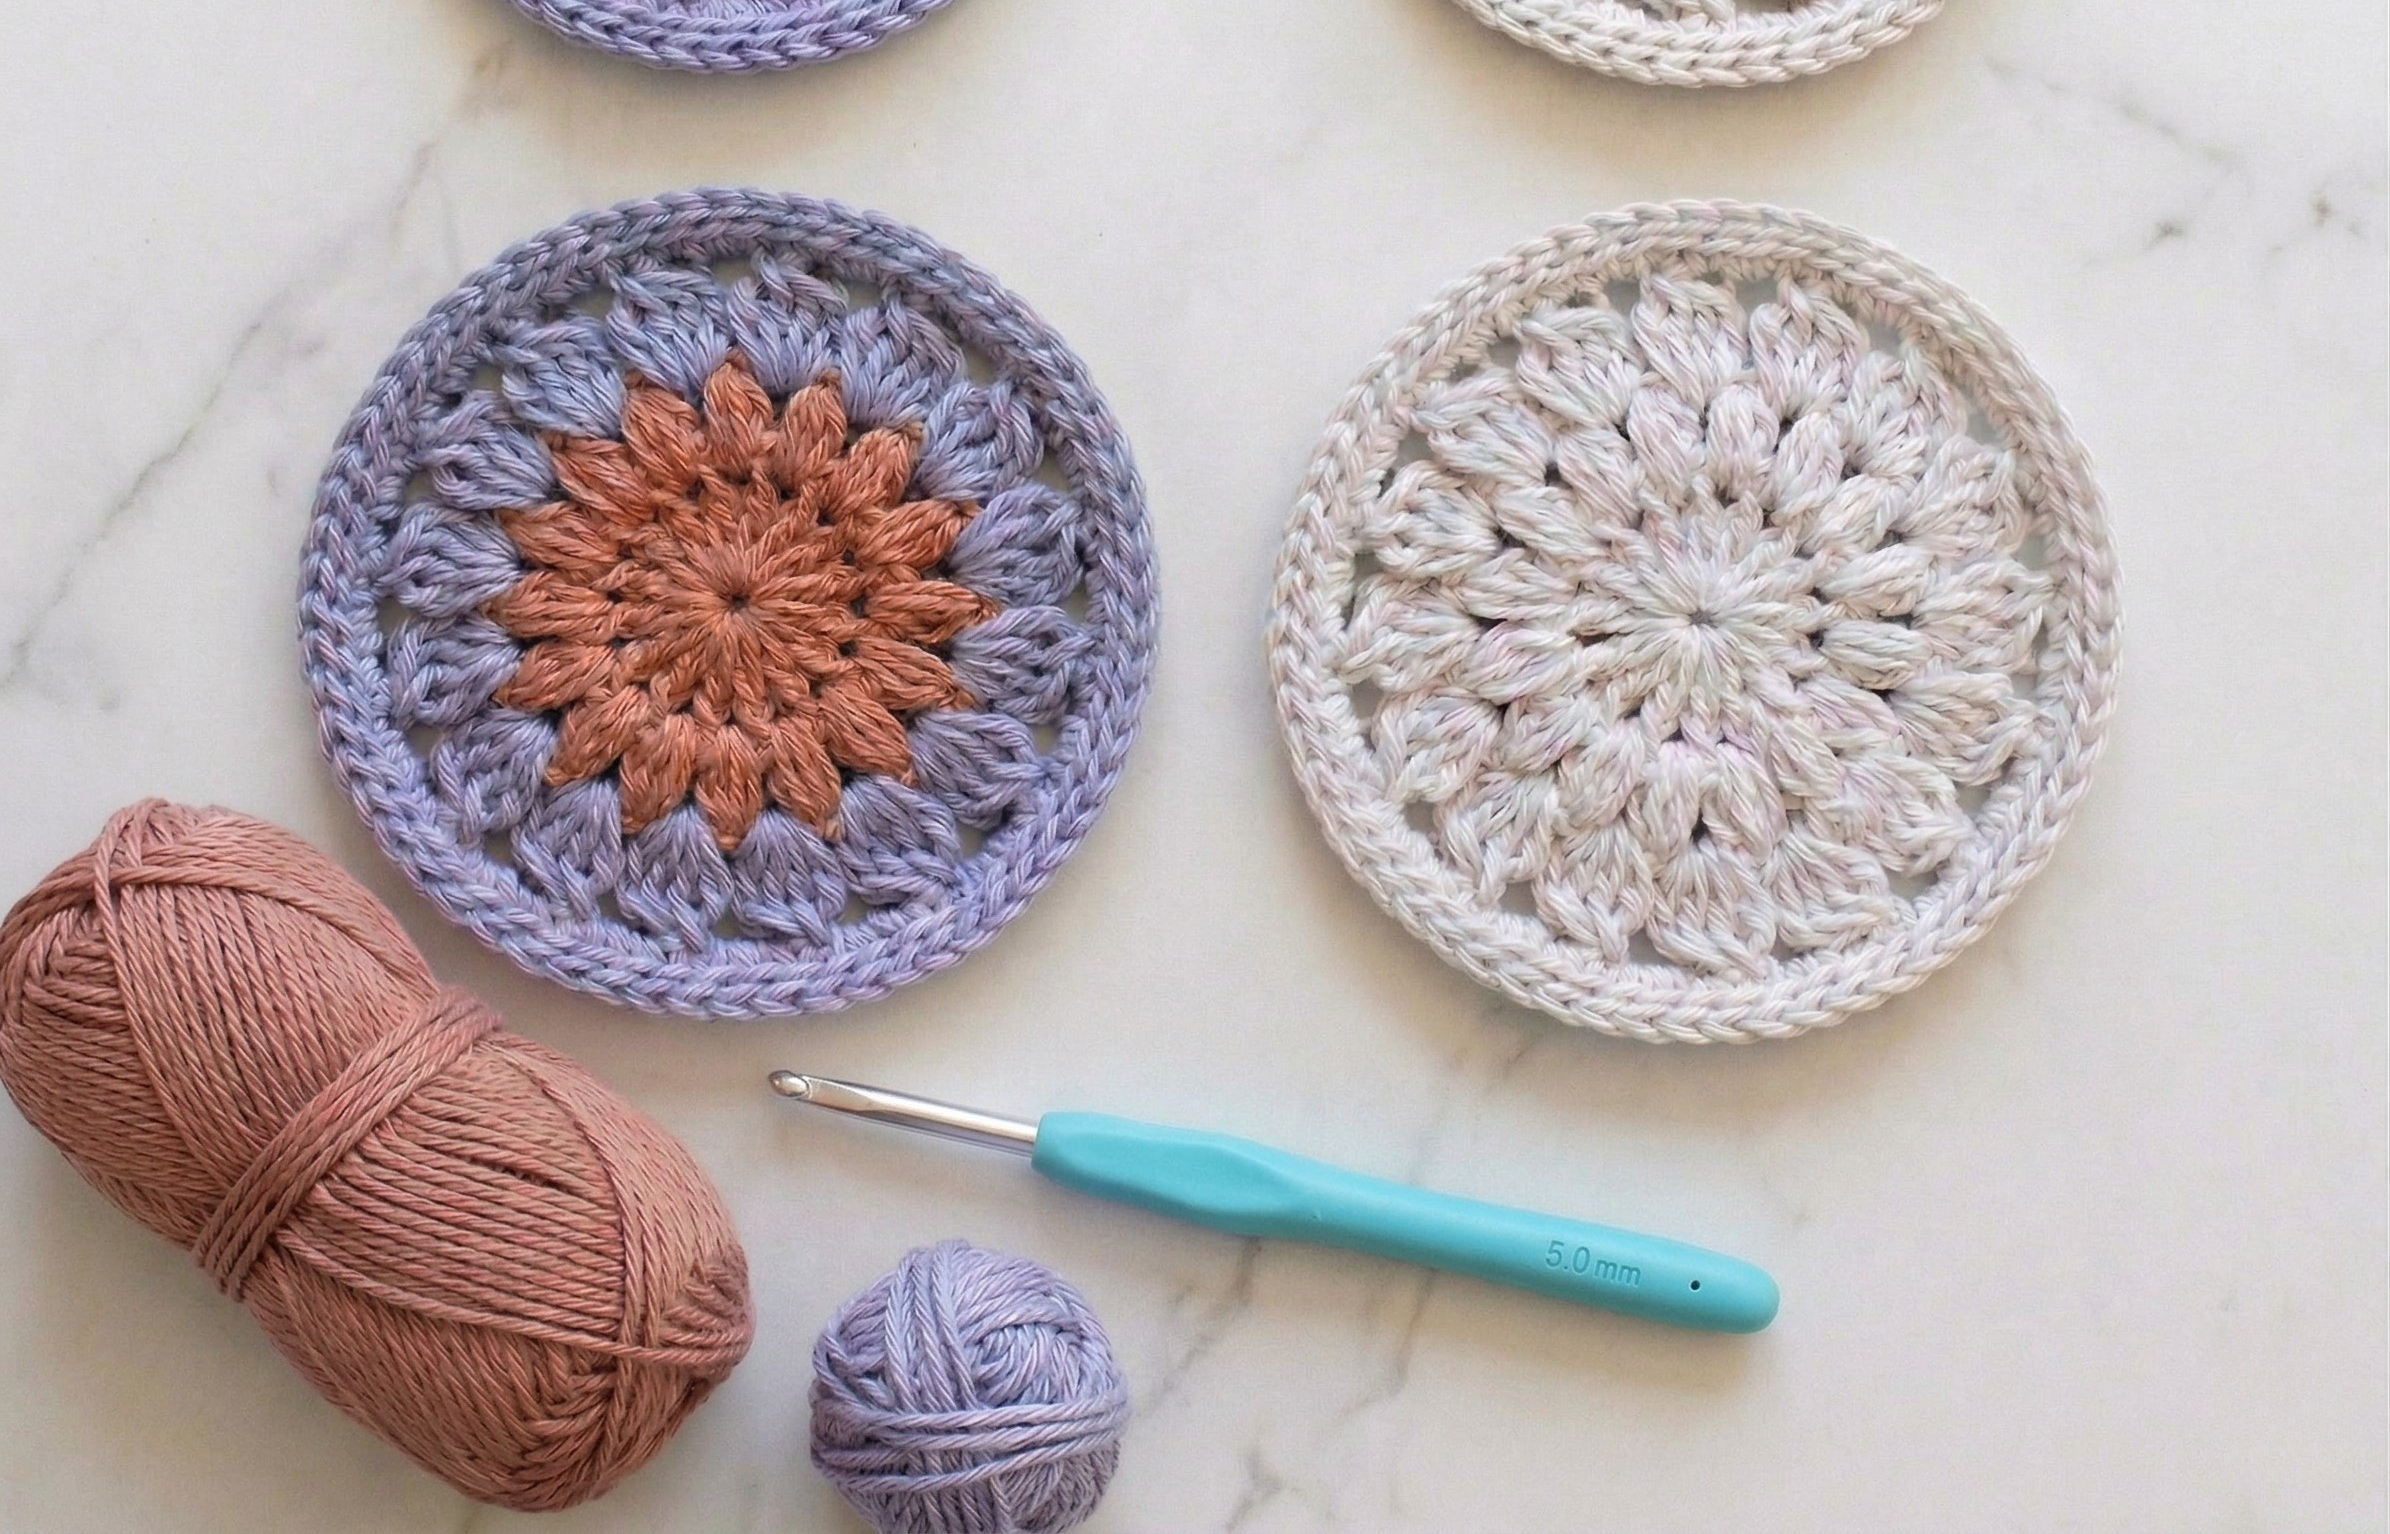
Sunburst Granny Square Pattern
This square is the feature motif used to make the bag. It begins as a circle, builds into a beautiful textured centre, and then gradually forms into a neat square shape that is perfect for joining.
Round 1
Make a magic ring.
Ch 2 (counts as first HDC), then work 7 HDC into the ring.
Join with a ss to the top of the beginning ch-2.
[8 HDC]
Round 2
Ch 2 (counts as first HDC), then work 1 HDC in the same stitch.
Work 2 HDC in each stitch around.
Join with a ss to the top of the beginning ch-2.
[16 HDC]
Round 3
Ch 3 (counts as the first leg of a cluster), then work 1 DC in the stitch at the base of the ch-3, ch 1.
In each stitch around, work:
(2DC cluster, ch 1)
Join with a ss to the top of the beginning ch-3.
[16 2DC clusters, 16 ch-1 spaces]
Round 4
Slip stitch into the next ch-1 space.
Ch 3 (counts as first leg of a cluster), then work 2 DC in the same space, ch 1.
In each ch-1 space around, work:
(3DC cluster, ch 1)
Join with a ss to the top of the beginning ch-3.
[16 3DC clusters, 16 ch-1 spaces]
Round 5
Slip stitch into the next ch-1 space.
Ch 3 (counts as 1 DC), work 1 DC in the same space, ch 1.
This forms your starting side group.
Now work the following sequence around:
- 3 HDC in the next ch-sp, ch 1
- 3 DC in the next ch-sp, ch 1
- (3 TR, ch 2, 3 TR) in the next ch-sp, ch 1
- 3 DC in the next ch-sp, ch 1
Repeat that sequence 3 more times, but on the final repeat, stop after the corner section.
Do not work the last 3 DC group, as your beginning group completes that final side.
To finish the round, work 1 DC into the starting group so it matches the opening side section, then join with a ss.
[60 sts, 16 ch-1 spaces, 4 ch-2 corner spaces]
Round 6
Slip stitch into the next ch-1 space if needed.
Ch 1.
Work 1 BSt in the top of the first stitch of the next 3-stitch group, ch 1, skip the next stitch, then work 1 BSt in the third stitch of that same group.
Continue this pattern all the way around:
- 1 BSt in the first stitch of each 3-stitch group
- ch 1
- skip the middle stitch
- 1 BSt in the third stitch of the group
In each corner ch-2 space, work:
(1 BSt, ch 2, 1 BSt)
Join with a ss.
[48 BSt, 44 ch-1 spaces, 4 ch-2 corner spaces]
Round 7
Ch 2 (counts as first HDC).
Work 1 HDC in the back of each Bean Stitch and 1 HDC in each ch-1 space around.
In each corner ch-2 space, work:
(1 HDC, ch 2, 1 HDC)
Join with a ss to the top of the beginning ch-2.
[100 HDC, 4 ch-2 corner spaces]
Finishing the Square
Fasten off and weave in all ends.
A Helpful Note About Round 5
Round 5 is the round that transforms the motif from a circle into a square, so it can feel like the trickiest part at first. It often helps to think of each side as being made up of:
- one HDC group
- one DC group
- one corner
- one DC group
Once you can see that structure, the shaping becomes much easier to follow.
How to Join the Squares
This bag is joined using single crochet in the back loop only, which creates that lovely raised seam detail you can see in the finished bag.
To do this, place the wrong sides of the squares together, then insert your hook through the back loop only of the stitches that sit next to each other on both squares. Work a single crochet to join them together.
It sounds a little more technical than it really is, but once you begin, it is actually very simple and gives the bag such a beautiful textured finish.
Can You Sew the Squares Together Instead?
Yes, absolutely. If you prefer, you can sew the squares together instead of crocheting them.
A neat whip stitch works well for this. Place the wrong sides together and stitch through the matching edges. Sewing the squares uses a little less yarn, but it won’t give you the same raised seam detail that the crochet join creates.
So if you love that textured look, crocheting them together is definitely worth it.
Final Thoughts
And just like that you’ve now completed your Sunburst Granny Square Bag! I hope you’ve enjoyed making your Sunburst Granny Square Bag as much as I’ve enjoyed sharing it with you.
Whether you make yours in soft neutrals, earthy tones, or a mix of playful colours, this bag is one of those projects that feels as enjoyable to make as it is to use, Enjoy x

No Comment Found.